Showing posts with label DIY. Show all posts

Thursday, August 28, 2014

DIY Hair Bow and Chokers

Ok so I know I haven't been non here in a while. I have had a bad case of writes's block, and I still have it. But while I've been going through that I have been making a few hair bows and I also got around to making a choker.

I am still working out the kinks in both my hair bows by finding easier ways to make them. And I also need to work on a tutorial on my choker.

But for now, I just want to show you what I have been doing in the mean time.

The first two pictures are my hair bow that I have been practicing. This time I am using a mesh ribbon with just some double sided tape and my hot glue gun.

As I keep practicing, I am getting more better at it and now I have a lot of awesome bow ideas that are coming to mind. I might have to start sketching some of these ideas to remember what I want to make at a later date and when I have the right materials.

My first use of the mesh ribbon. I actually recommend using this type of ribbon as it isn't flimsy like the satin ribbon.

Slightly getting better at making my bows.
As much as I love using the satin ribbon. The mesh ribbon as become my favourite to use.


Now for my chokers.

I did do a test choker just to see how well it would turn out for me. I pretty much followed the instructions from Lady Spleen, and her Diy Velvet Ribbon Choker.

Test Choker made from Zebra Print Grosgrain Ribbon


Now even though it looks plain. It was the whole point to it being a "tester". I didn't want to make something that wasn't going to work for me. But in the end, it actually came out better than I expected. Yes it was a little loose around my neck as my measurements were off by a centimeter.

Then the next day, I decided to play it up a little and try a satin ribbon choker. This time adding a Dolphin Cameo.
My Dolphin Choker that I'm quite proud of.

I have to say that I am quite proud of this one. It's only my second choker that I made, but I just absolutely love it.

Saturday, August 9, 2014

DIY Hair Bow Tutorial

Who doesn't love hair bows?

I have only recently stated liking hair bows. Now I am not really a girly kind of girl and don't really wear bows in my hair.

But I have come to fall in love with all kind of bows like cute cats, music notes, superheroes etc. And I can't wait to make more of these in different styles as well as fabric bows and expand my hair bow collection.

I was inspired to write my own tutorial from Instructables and The Ribbon Retreat Blog, while I was searching for hair bow tutorials on Google.

I am going to do my best at showing you how to make a Satin Bow.


My first satin bow I made.


I do hope my tutorial will be easy to understand. I tried to get as many pictures as I could for this tutorial.

And I hope you enjoy making and wearing these lovely satin bows.

*If anyone wonders why I have a few different types of backgrounds, it is because I had to do a few takes with this tutorial....  I did make a joke on Facebook that it would take me all day. Turns out it did!  And I also tried to make it the one colour purple but I didn't quite get there.


You need these materials to make this bow.


MATERIALS NEEDED:

* Satin Ribbon
* Ruler
* Needle & Thread
* Scissors
* Lighter
* Glue Gun


First you need to cut your ribbon. You need 2 strips of 8 inch ribbon and a small piece at 2 inches.


Seal your ribbon ends by ether using your preferred method or by using the lighter. Like I did.


Now get some double sided tape or fabric adhesive and put it on one end of the ribbon. 


Fold the piece of ribbon to the other end over to make a circle. 


After you thread your needle. Run the needle through the middle of your ribbon. 


Pull the needle through and wrap the thread around the bow a few times and secure using the thread. 


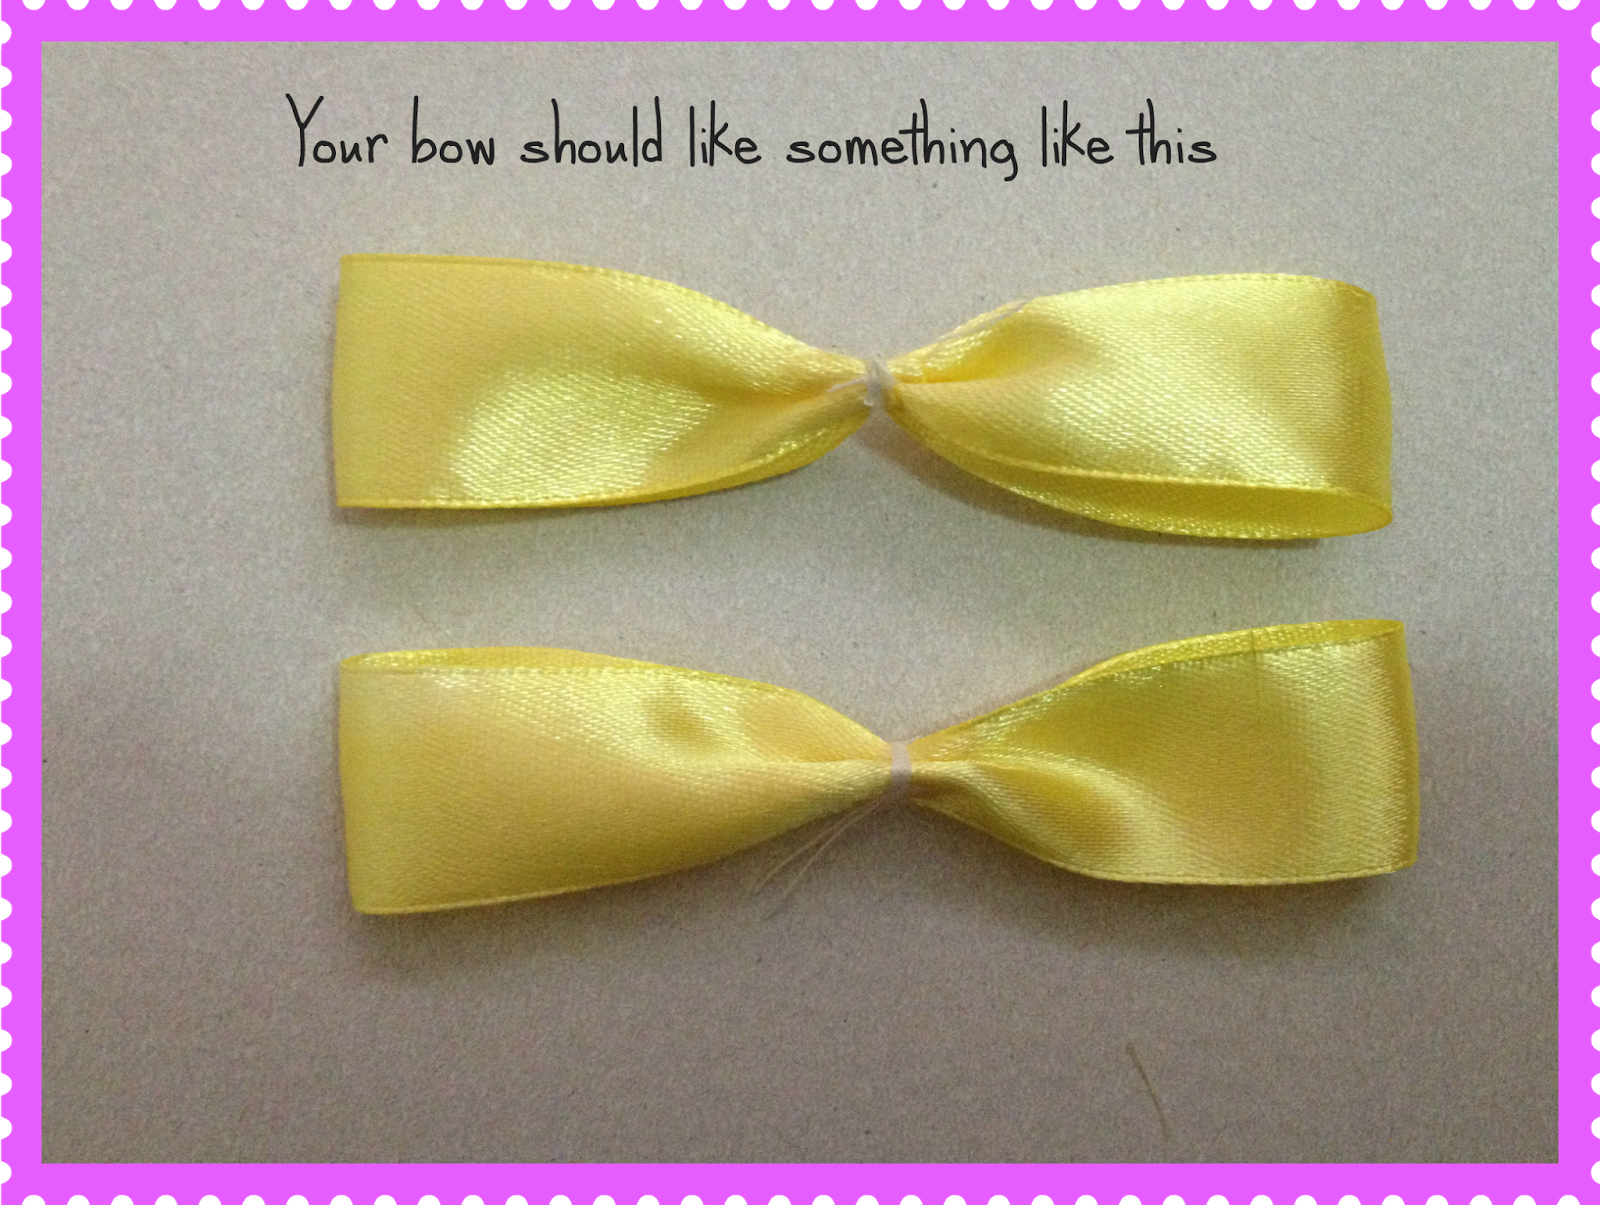
And here is your first bow done. Now repeat the previous steps to make another one and you should have two bows that look similar.


Using your needle and thread again, stitch the two bows together like you did with the singular bow.  


And now you have a bow just needing the final touches.


Now using the smaller piece of ribbon, get the double sided tape (or fabric adhesive) and stick to one side length ways. then fold over.


Dab some hot glue to the middle of the bow and place one end of the smaller ribbon over the glue and hold for a few seconds.


And wrap around the middle of the bow and secure the end with another dab of hot glue. Trim off any excess ribbon.


And voila! Congratulations you have just made a bow.


 To make these wearable, you will need a crocodile clip.

Get a crocodile clip and just slide it through the back of the bow where the crease is.


And that concludes my tutorial on how to make a Hair Bow. I do apologize with how long the post is, but I wanted to make sure I got all the steps that I went by.

It also took me two days to create this post. Who would have thought that this would take me this long to write it.

 
~ Wendy

Sunday, August 3, 2014

Tutorial on how to cut an Aluminium Can

I am working on a Sailor Moon project that requires me to use aluminium cans.

So I thought in today's post I will guide you on how to cut one. I will be working on a video sometime at a later date.


Ok these are the tools that is needed for this project:

Soft Drink Cans
Knife
Scissors
Paper Towel


STEP 1:

The first thing you need to do is rinse out your cans and let them dry.


STEP 2:

*Safety Warning*
Now before you start cutting your tin can you should be very careful as to not cut yourself or getting any tin shards in your eye. You might want to get some protective goggles and a pair of leather gloves for your safety. I didn't have these on hand so I was extra careful when I was cutting and taking my time with care and patience.


Puncture two holes in the can with your knife.


STEP 3:

Now use your knife to cut in between the two punctures to create an "I" figure. Like so.


STEP 4:

Using your scissors, start cutting along one side to about half way then flip over and cut all the way through to the end of the can. Then finish the other side.


STEP 5:

Now your can should now look like this.


STEP 6:

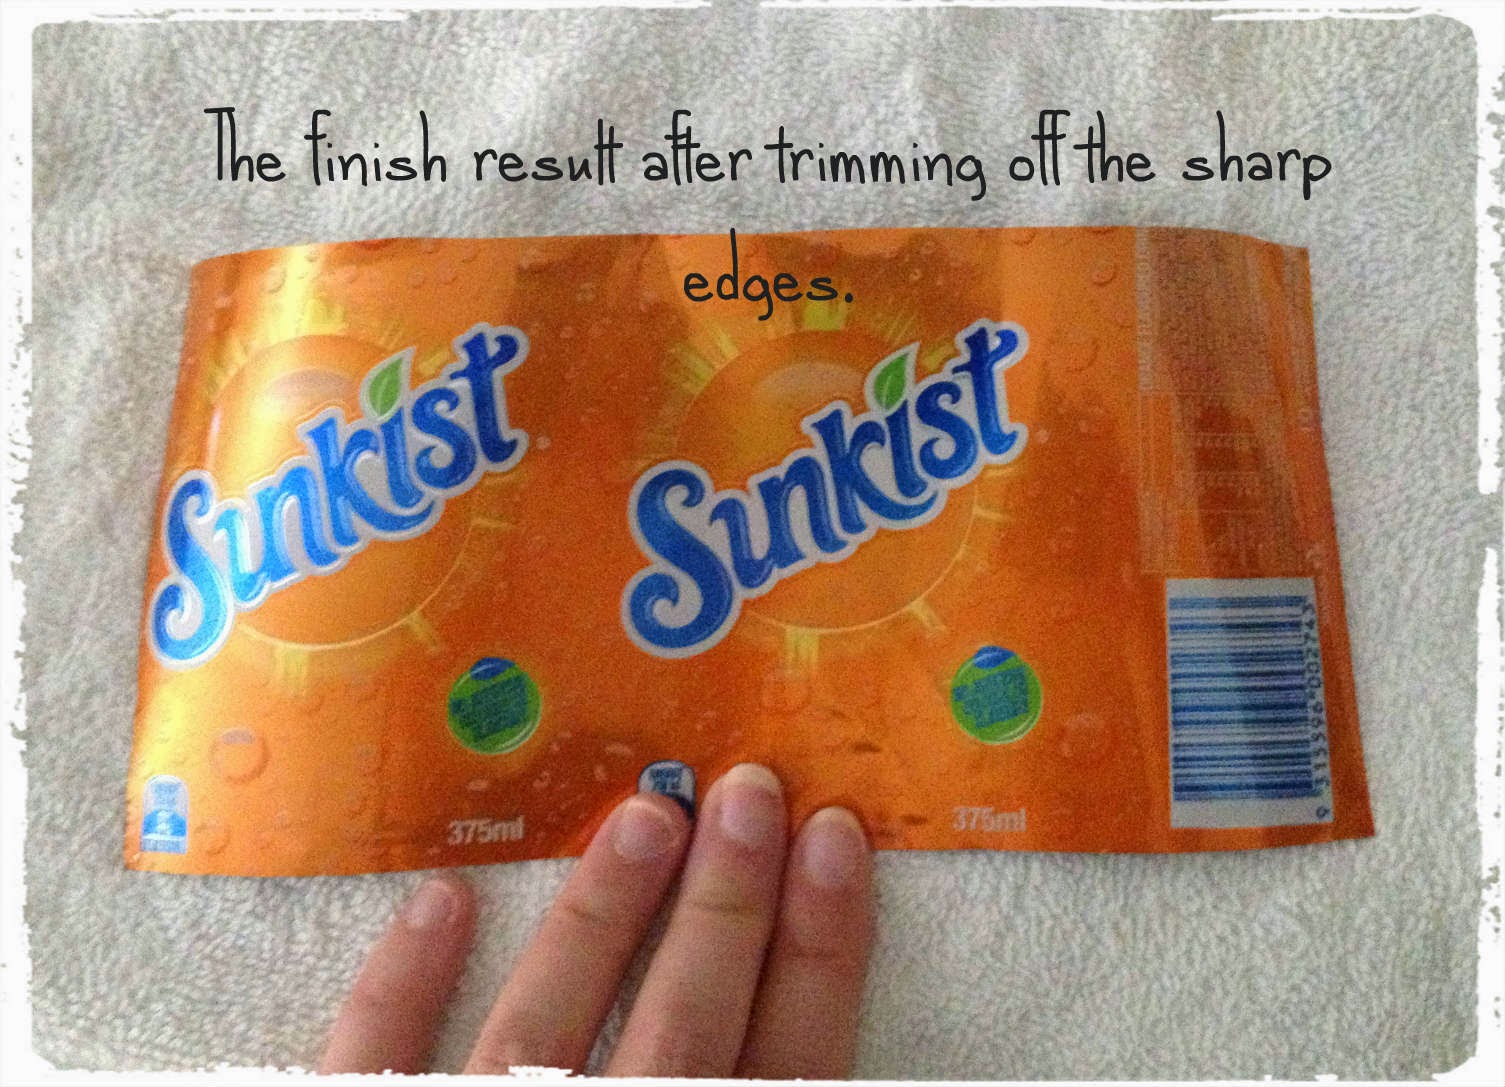
Trim the edges to get rid of any sharp bits.


And you have yourself a piece of aluminium.


And that concludes my my first tutorial. I hope you found this post informative. I had fun doing this =)

Stay tuned for part 1 of my Sailor Scouts Tiaras made from these Aluminium Cans.

Monday, July 28, 2014

Swatch sample projects

Just a quick post showing what else I did with my samples I got from Spoonflower.

I do love the fabric swatch I got and can't wait to turn it into a hair bow. It is going to look awesome!

Fabric Sample


And here is my water bottle. This was the very first thing I made with the wallpaper sample and I just love it.

And now that I have more plastic bottles I need to get another sample piece to cover them =)

My favourite water bottle. 


Thursday, July 17, 2014

DIY Incense Storage Box

So the second project I got to finish was my Incense Storage Box that I had out in the kitchen.


The box went from this recycled tissue box to this...


Now I had some extra wrapping paper left over from when I did my Recipe Holder . So keeping with the theme I had started, I decided to use the same paper for my incense box.

Instead of using normal scotch tape like I had with the Recipe Holder. I used my favourite Elmer's adhesive spray for this project.
It had made this project go so much easier as I didn't have use the tape. I may just end up redoing my recipe folder with the spray. But I will need to buy more wrapping paper before I do as a "just in case something goes wrong".

The final result with the incense sticks back in its box. 


DIY Pen Holder

Ok I have managed to get 2 projects completed. Took me no more than an hour to complete

I have fallen in love with Elmer's Adhesive Spray  that I bought from Officeworks about a year ago and never really got to use it until now.

DIY Pen Holder

So my first project I finished was my pen holder.

I recycled a 420g Heinz Spaghetti Can that I had for lunch a few days ago. (I am now collecting tin cans of all sizes despite what my boyfriend says - he thinks it is all rubbish!). And I had just left it on the table in my craft room waiting for it to be prettied up with a sample of my wallpaper I made over at Spoonflower.

I do apologize for not having a before shot of my tin can. But i'm pretty sure everyone knows what they look like.

My pen holder before I added the pens. I do feel that there is something missing, but for now I am happy with it. 

With the pens added. The photo is a little dark due to the angle I took the photo. 


I love recycling and re-purposing cans and glass jars. I just can't keep that many in the house at the moment until I have proper organization in my craft room.. I have even saved the tiny cat food tins that I have a project in the works for. The only thing I do need to purchase for that project is some spray paint and either some more wallpaper or some thick washi tape.

The other thing I need to do, is to do up a DIY spray box for my adhesive spray so I don't get it everywhere.